
Professional camera cleaning: Flawless Results 2025
Why Professional Camera Cleaning is Critical for Your Security System
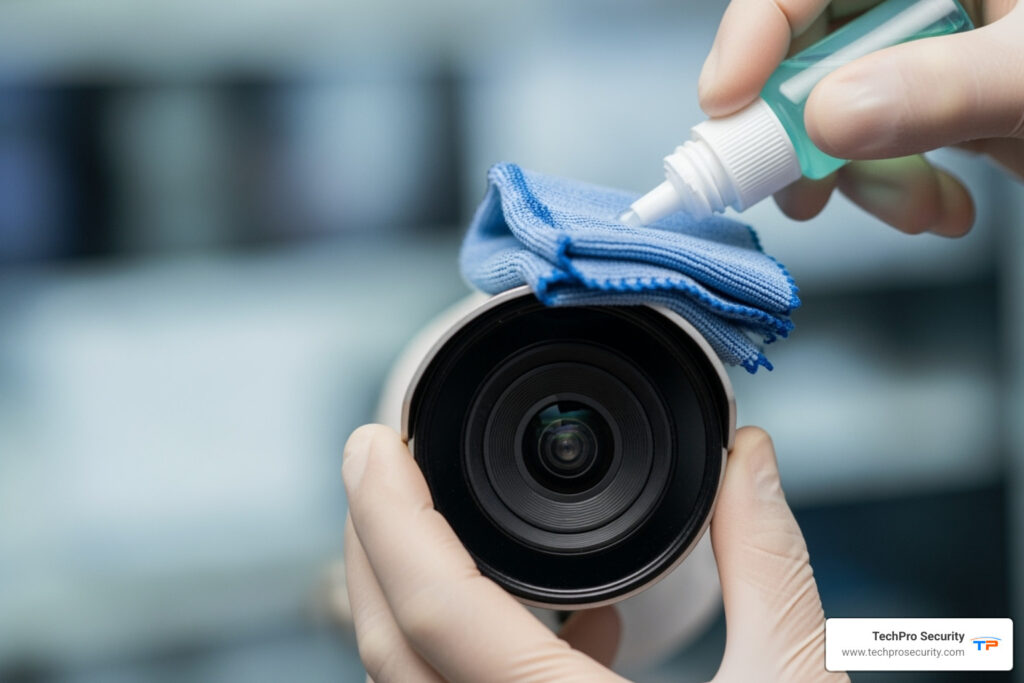
Professional camera cleaning is essential for maintaining clear image quality and extending the life of your security equipment. Dust, debris, and environmental factors can seriously impact the performance of any security camera system.
Quick Answer for Professional Camera Cleaning:
- DIY cleaning: Costs $20-45, takes 3-5 minutes, safe for basic maintenance
- Professional service: Costs $45-75, takes 7 days, includes calibration and repairs
- Essential tools: Rocket blower, microfiber cloths, lens pen, sensor swabs
- Cleaning frequency: Monthly for active systems, after harsh weather exposure
- When to go professional: Stubborn oil spots, autofocus issues, high-value equipment
Your security cameras work 24/7, and like any precision equipment, they need regular maintenance. Dirty lenses reduce image clarity, making it harder to identify faces or license plates. Dust on sensors creates dark spots in your footage, potentially obscuring critical details.
Fortunately, most camera cleaning can be done at home with the right tools. However, knowing when to call professionals can save you money and prevent equipment damage.
As Brad Besner, founder of TechPro Security Products, I’ve seen how proper professional camera cleaning and maintenance can extend equipment life by years. With over 15 years managing security systems across South Florida, I’ve learned that proactive maintenance is always more cost-effective than emergency repairs.

Gearing Up: Essential Tools for Camera Cleaning
Proper camera cleaning requires the right tools to protect your investment and ensure the crystal-clear images your security system depends on. Each tool serves a specific purpose, from gentle dust removal to tackling stubborn sensor spots. Let’s review what belongs in your cleaning arsenal.

Basic Cleaning Kit
These four essentials will handle 90% of maintenance tasks and keep your cameras performing beautifully.
The rocket air blower is a rubber bulb that shoots powerful puffs of air to dislodge loose dust. Its no-contact approach removes particles without touching delicate surfaces, preventing scratches. Always start with the blower.
Microfiber cloths are high-quality, lint-free cloths that trap dust and absorb oils without scratching. Always use a clean cloth, as a dirty one can damage your lens.
A lens cleaning pen is a two-in-one tool with a soft, retractable brush for dust and a carbon tip for removing fingerprints and smudges. It’s compact and effective for quick touch-ups.
The soft-bristled brush cleans tricky spots like camera body crevices, buttons, and lens barrel grooves. A clean, soft makeup brush can also work well.
Advanced Sensor Cleaning Kit
Your camera sensor is the most delicate component, requiring specialized tools and a steady hand.
Sensor swabs are single-use, lint-free paddles that come in specific sizes to match your camera’s sensor. Using the correct size is crucial to clean effectively and avoid damage.
Sensor cleaning fluid is formulated to evaporate without residue, dissolving stubborn spots like oil or water marks. Never use household cleaners or generic alcohol, as they can permanently damage the sensor’s coating.
A magnifying loupe with LED lighting helps you see tiny particles on the sensor, ensuring a thorough cleaning. Without it, you’re essentially cleaning blind.
For those curious about the technical side, the science behind dust removal reveals fascinating details about how different particles behave on sensor surfaces.

Investing in quality cleaning tools pays off in equipment longevity and image quality. For any camera system, the right tools are the difference between amateur results and professional camera cleaning.
The How-To Guide: Step-by-Step Camera Cleaning
Before starting, find a clean, well-lit, dust-free workspace away from open windows or fans. Patience and precision are essential.

Cleaning Camera Lenses (Front and Rear Elements)
Cleaning your lenses is a routine task that significantly impacts image sharpness.
- Blow Away Loose Dust: With the lens facing down, use a rocket blower to remove loose dust from the front and rear elements to prevent scratches.
- Brush Off Stubborn Particles: Use the soft brush of a lens pen or a dedicated soft-bristled brush to gently sweep away remaining particles, working from the center outwards.
- Circular Wipe with Microfiber Cloth: For general smudges, gently wipe the lens with a clean microfiber cloth in a circular motion from the center outwards, using minimal pressure.
- Lens Solution for Smudges: For stubborn fingerprints or spots, apply a small amount of lens cleaning solution to a clean microfiber cloth (never the lens) and wipe in a circular motion. Pre-moistened lens wipes, like those from Zeiss (a pack of 200 costs about $13.90 USD), are also an excellent, quick-evaporating option.
- Clean the Rear Element: Clean the less-exposed rear element with the same care: blower (facing down), brush, and a gentle wipe if needed.
- Cleaning Lens Contacts: Periodically clean the electronic contacts on the lens and camera body with a dry microfiber cloth to ensure reliable autofocus and aperture control. For stubborn grime, use a cotton tip lightly dampened with isopropyl alcohol, being careful not to let liquid drip inside.
Cleaning the Camera Body and Exterior
Consistent cleaning prevents grime from migrating to more sensitive areas.
- Wiping Down the Body: Use a soft, lint-free cloth to wipe the camera exterior, removing sweat and grime. For tough spots, use a slightly damp cloth followed by a dry one, avoiding seams and openings.
- Cleaning the LCD Screen: Gently clean the LCD screen with a microfiber cloth and a specialized screen cleaner to remove smudges.
- Cleaning the Viewfinder/Eyepiece: Use a blower or soft brush on the viewfinder/eyepiece, followed by a wipe with a microfiber cloth.
- Cleaning Contact Points: Clean the camera body’s lens mount contacts with a dry microfiber cloth or a cotton tip with a tiny amount of isopropyl alcohol.
- Cleaning Ports and Card Slots: Use a rocket blower to clear dust from ports and card slots. Do not insert solid objects that could damage the pins.
Just like our security camera installation services ensure your surveillance equipment functions optimally, proper care for your photography camera is equally vital. You can explore our resources on maintaining security equipment.
Considerations for Specialized Equipment
Different camera types have unique cleaning considerations.
- DSLR Cleaning: DSLRs have a delicate mirror that should never be touched. Use a rocket blower to clean the mirror box and focusing screen. Persistent dust on the focusing screen requires professional service to avoid damage.
- Mirrorless Camera Cleaning: With mirrorless cameras, the sensor is exposed when the lens is removed, making it prone to dust. Always point the camera body down when changing lenses. Many newer models have a protective shutter that closes when powered off.
- In-Body Image Stabilization (IBIS) Considerations: For cameras with IBIS, the sensor moves. Activate the camera’s manual sensor cleaning mode to lock it in a fixed position before cleaning to prevent damage. Always check your camera’s manual for the specific procedure.
The Heart of the Matter: DIY vs. Professional Camera Cleaning for Sensors
Cleaning the camera sensor can be nerve-wracking, but it doesn’t always require a professional. Modern sensors are more durable than they seem, protected by a glass filter. With the right tools and technique, the risk of scratching is low.
| Feature | DIY Sensor Cleaning | Professional Sensor Cleaning |
|---|---|---|
| Cost | $20-$45 (for a good kit) | $45-$75 (per cleaning) |
| Time | 3-5 minutes (once you know how) | 7 days (typical turnaround) |
| Risk | Low, if proper tools/technique used; higher perceived risk | Very low (expert handling) |
| Benefits | Cost-effective, immediate results, self-sufficiency | Expert handling, calibration, diagnostics, no personal risk |
The decision often comes down to confidence and circumstances. A DIY kit costs about the same as one professional cleaning but offers the freedom to clean whenever needed. Professional services provide peace of mind and often include extra checks.
The DIY Approach to Sensor Cleaning
The DIY approach is less intimidating than it sounds, as you’re cleaning the protective filter over the sensor, not the sensor itself.
Preparation is key. Ensure your battery is fully charged (over 75%) to prevent a mid-clean shutdown, and work in a clean, dust-free space.
The dry cleaning method is the first step. Activate your camera’s “Sensor Cleaning” or “Mirror Lock-Up” mode. Hold the camera body upside down and use a rocket blower to puff air into the sensor chamber. This often removes most dust.
Wet cleaning is for stubborn spots like oil or water marks that a blower can’t remove. Use a magnifying loupe to inspect the sensor first. Unwrap a new, correctly-sized sensor swab and apply one drop of cleaning fluid to the edge. Make one smooth pass across the sensor, flip the swab, and make a return pass. Never reuse a swab.
Locking the sensor is crucial if your camera has in-body image stabilization (IBIS). The sensor cleaning mode prevents the stabilization system from moving, which could cause damage. This precision is similar to how we calibrate our CCTV services.
When to Choose Professional Camera Cleaning
Sometimes, it’s best to let the experts handle it. Professional camera cleaning is the smart choice in several situations.
Stubborn contamination that resists DIY attempts requires professional help. Experts use specialized solvents for ‘welded’ oil spots or other difficult debris.
High-value equipment warrants professional care. For an expensive camera body, the $45-$75 cleaning fee is a worthwhile investment for expert handling.
If you see visible damage like scratches on the sensor, stop immediately and consult a professional for assessment and repair options.
Confidence matters. If you’re nervous, it’s safer to use a professional service. Hesitation can lead to mistakes.
Annual professional check-ups are a good idea even with regular DIY cleaning. These services often include autofocus calibration and can spot potential issues you might miss.
Our technicians at TechPro Security have over 25 years of experience with delicate electronic equipment. The same attention to detail that goes into our commercial security camera maintenance plans applies to any professional camera service.
Proactive Care: Best Practices for Camera Longevity
Preventive care is the best strategy for camera longevity, reducing the need for frequent professional camera cleaning. Smart habits can keep most dust and debris at bay.

Preventing Dust and Debris Accumulation
Dust gets everywhere, but you can keep your camera clean with a few smart habits.
Change lenses in clean environments. Avoid swapping lenses in dusty or windy locations. If you must change them outdoors, find shelter or do it inside a car.
When changing lenses, point your camera body down. Gravity will help keep dust from entering the camera and settling on the sensor.
Use body and lens caps. They are your camera’s best defense. Always cap the body and the rear of the lens when they are not attached.
A quality camera bag protects your gear from dust and damage. Store your camera in its bag when not in use.
Avoid extreme temperatures and humidity, which can cause internal condensation and lens fungus, a common issue in humid climates like Florida.
Establishing a Regular Maintenance Routine
Consistency is key to keeping small problems from becoming big headaches.
Monthly cleaning is a simple, five-minute routine with a blower and cloth that can prevent bigger issues.
Clean after shoots in challenging environments like beaches or deserts to prevent permanent damage from salt or sand.
Do a quick pre-shoot check. A 30-second inspection for smudges can save an entire shoot.
For long-term storage, clean the camera thoroughly, ensure it’s dry, and use silica gel packets in the bag to absorb moisture.
Just as our comprehensive security camera maintenance plans ensure your surveillance system runs smoothly, these simple routines keep your photography gear at its peak. You can explore more details on commercial camera maintenance plans to see how professional maintenance extends equipment life.
Frequently Asked Questions about Professional Camera Cleaning
Here are answers to the most common questions about professional camera cleaning.
What common issues can professional cleaning resolve?
Professional cleaning tackles a range of issues that basic DIY methods can’t.
Persistent sensor spots are a common problem. Professionals can remove stubborn oil, dried water spots, or ‘welded’ dust that DIY methods can’t fix.
Autofocus problems often stem from dirty contacts. A professional cleaning restores the electronic communication between the camera and lens, resolving focus hunting or inaccuracy.
Sticky buttons and dials can be frustrating. Professionals have the tools to safely clean these mechanisms from accumulated sweat, oil, and debris without causing damage.
Fungus and haze issues can develop inside lenses in humid climates like South Florida. If caught early, a professional cleaning can often save the lens.
Mirror box cleaning for DSLRs requires expertise. Professionals can safely clean the delicate mirror and focusing screen, which are easily damaged.
How does professional cleaning differ from what I can do at home?
The differences lie in equipment, expertise, and the scope of service.
Specialized equipment is a major factor. Professionals use powerful cleaning solutions, advanced magnification, and dust-controlled environments.
Autofocus calibration is a key professional service that fine-tunes the focus system for each lens to improve sharpness. This cannot be done at home.
Comprehensive diagnostics are performed to identify underlying mechanical or electronic issues you might not have noticed.
Experience is crucial when handling expensive, delicate equipment. Professionals have cleaned thousands of cameras, minimizing risk and maximizing results.
Minor repairs can often be handled during a professional cleaning service, which is a convenient way to address small issues.
Are there different cleaning needs for DSLR vs. Mirrorless cameras?
Yes, their different designs create unique cleaning challenges.
DSLR cameras have a mirror protecting the sensor, but the mirror itself is extremely delicate and easily damaged. The mirror box can also collect dust, affecting the viewfinder.
Mirrorless cameras have an exposed sensor when the lens is removed, making them more prone to dust but also more straightforward to clean.
In-body image stabilization (IBIS) is a feature in many mirrorless cameras where the sensor moves. You must use the camera’s cleaning mode to lock the sensor in place before cleaning to avoid damaging the mechanism.
Protective shutter features on newer mirrorless models often close when the camera is off, reducing the need for frequent sensor cleaning.
Conclusion
Regular professional camera cleaning practices protect your investment and ensure every shot is clear, whether for family photos or business surveillance.
This guide has equipped you to handle most cleaning tasks yourself, from choosing the right tools to safely cleaning lenses and sensors. The confidence to maintain your own gear is empowering, but knowing when to call a professional is just as important.
DIY cleaning handles about 80% of maintenance needs, like monthly dust-offs and minor smudges. However, for expensive equipment, stubborn oil spots, or precision autofocus calibration, professional services are the right choice. It’s not about admitting defeat; it’s about choosing the right tool for the job.
At TechPro Security, we understand this balance. Proper maintenance—DIY or professional—extends equipment life and ensures peak performance. Clean lenses mean clear images, which lead to better security and business outcomes. The best routine combines regular DIY care with occasional professional check-ups.
Ready to apply these techniques to your security camera system? Our team brings the same meticulous care to commercial surveillance equipment. Explore our comprehensive security camera maintenance services to see how we keep your security investment running smoothly.